Deploying Remote Assistance
When I come to customers I most of the time see some third party management tools installed on client workstations (for example VNC). These tools are used by administrators to manage workstations remotely. They are able to see user’s desktop and solve a problem. Administrators thinks the only tool to manage user’s desktop is to connect to workstation with RDP. Problem with RDP is that user and admin cannot see same screen and just one ot them can work on actual desktop.
Microsoft implemented Remote Assistance feature to Windows since Windows XP. It’s technology based on shadowing technology used in Terminal Services/RDS on server based OS. It is great tool to implement (or just configure) in corporate environment. It can be also used in home environment. There are two modes how to make connection:
-
Initiated by person which needs help (home/corporate use)
- Initiated by helping person (mostly by professional use) – called Easy Connect
When person which needs help wants to send request for help to helping person, he can do it using following ways:
- Using Microsoft Messenger
- Creating special kind of file
- Sending mail
I will not describe how to use Remote Assistance in home environment. I will focus on corporate use. Most of the time you have some administrators for workstations and, of course, workstation users. Workstation users always have a problems they cannot handle and we, as a admins, need to see a problem which user sees and need to solve a problem. Let’s work with environment where Active Directory domain is implemented. We will implement two methods of providing help to users.
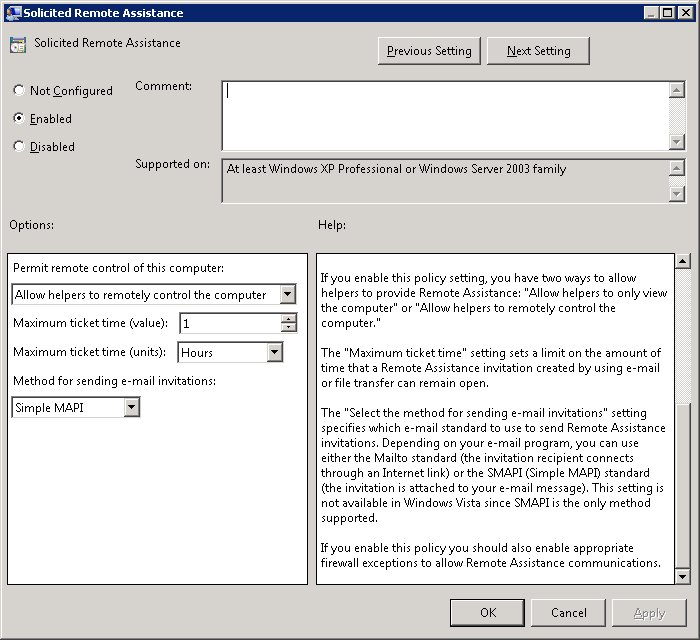
You can configure Remote Asistance on computers in domain using GPO. Configure if you users can send invitations for Remote Assitance (called Solicited Remote Assistance) (Computer Configuration — Policies — Administrative Templates — System — Remote Assistance — Solicited Remote Assistance):
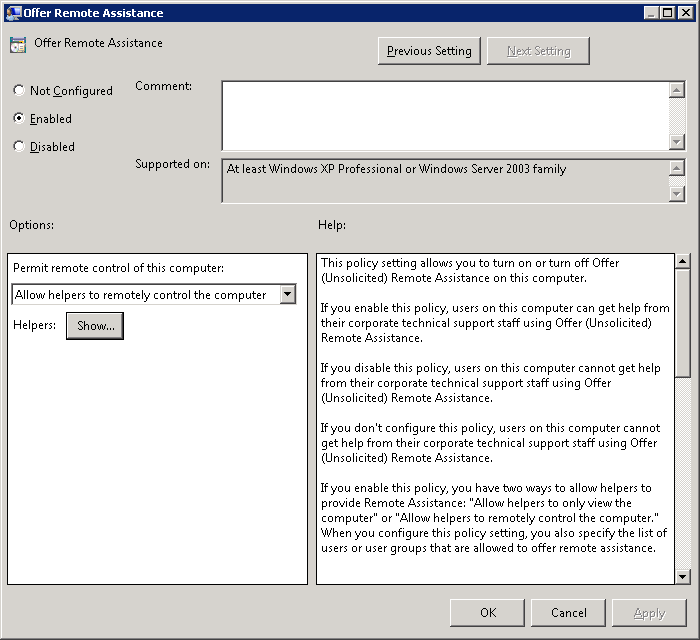
and also if someone can offer help to users (Computer Configuration — Policies — Administrative Templates — System — Remote Assistance — Offer Remote Assistance):
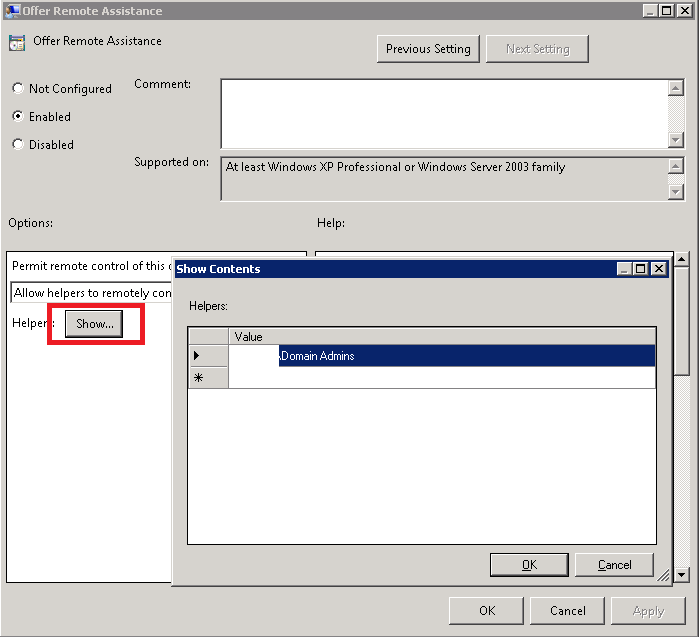
Don’t forget to specify users/groups which can send you offer for Remote Assistance by clickin on button “Show…” in this GPO settings:
You can configure more options in GPO:
-
Allow only Vista or later connections – this feature enables improved encryption of invitations
- Turn on session logging – enables logging of Remote Assistance sessions. Log files are located under user’s Documents folder under Remote Assistance
- Turn on bandwidth optimization – you can set optimization of sessions
- Customize Warning Messages – you can custom warning messages before connecting and before sharing control
When you apply GPO you can use Remote Assistance.
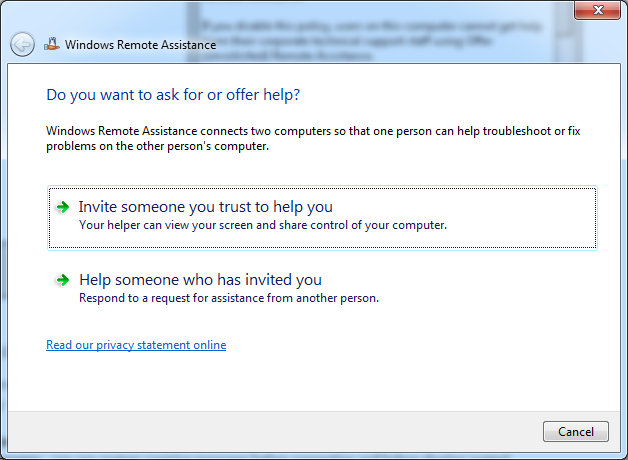
Workstation users can ask for help by running Windows Remote Assistance (msra.exe):
Click “Invite someone you trust to help you”:
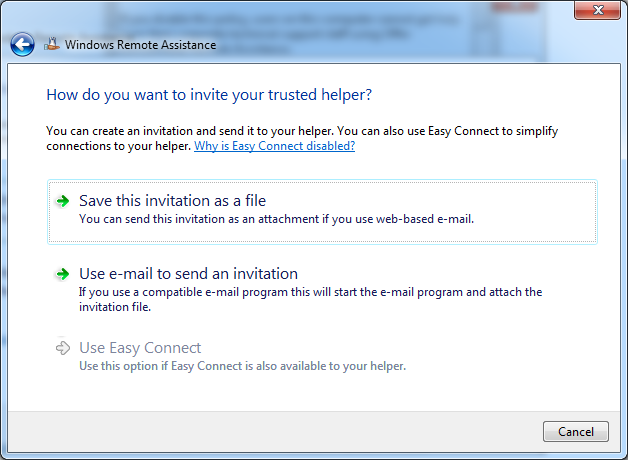
And you can choose method how you want invite helper:
- Save this invitation as file – This will save your invitation information into file and you can distribute this file to your administrator. There can be some file share or you can send it as attachement to your administrator.
- Use e-mail to send an invitation – This option is enabled when you have mail client installed (Outlook). It will open up New message in mail client and fill required fields. It will also attach generated invitation file to mail message.
- Use Easy Connect – This option helps users to select from available helpers. This options is nice, but it depends on IPv6 tunneling interface Teredo. You need to have IPv6 enabled on computers, Teredo interface has to be in Enterprise mode and service Peer Name Resolution Protocol.
Use Easy Connect
Just some remarks to setup of Teredo interface:
- You can check the status of Teredo interface by running command netsh int teredo show state. If you see Type set to “Client” then Easy Connect won’t work. You should change it to type “Enterprise Client”. You can do it in two ways. One is by running command netsh int teredo set state type=enterpriseclient and other is by GPO (Computer Configuration — Policies — Administrative Templates — Network — TCPIP Settings — IPv6 Transition Technologies — Teredo State set toEnterprise Client).
- You can check if Peer Name Resolution Protocol works correctly by running command netsh p2p pnrp cloud show list. You should see status Active (rather than Virtual and Alone) in line named Global_.
- Your router should support UPnP technology if you are going to support machines behind NAT.
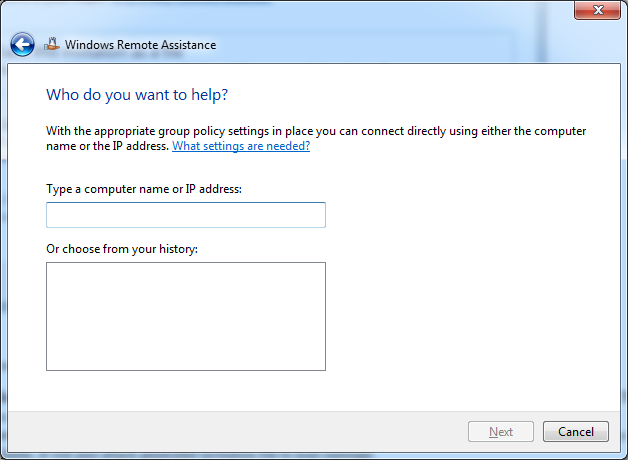
If you are admin and you want to provide help to user, the easiest way is to run msra.exe /offerra:
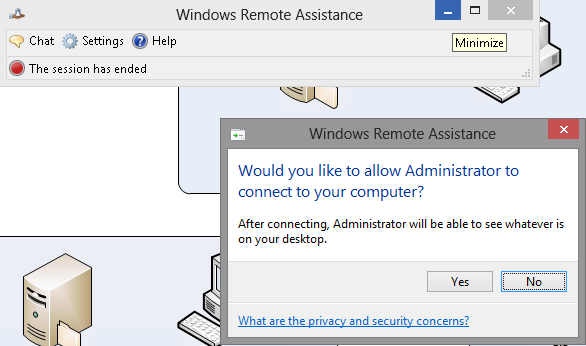
type IP address/name of computer which needs help and you can manage it. When you offer assistance, user is asked to approve your assistance:
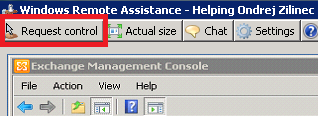
This opens Read-only view of desktop. If administrator wants to get full control of desktop, he needs to request for it by clicking button “Request Control” in his Remote Assistance window (just for Robert Švec – upper left corner 🙂 ):
From now this is very intuitive to use. This feature is nice to use and you don’t have to install any 3rd party solutions.
If you want to use Remote Assistance on Windows Server OS, you need to install feature:
Windows Server 2008 R2:
ServerManagerCmd.exe -install Remote-Assistance
Windows Server 2012:
Install-WindowsFeature Remote-Assistance
You also need to create some exceptions on firewall:
- If you want to offer assistance, computers which need help have to have following exceptions:
- Windows Vista and later
- Port 135:TCP
%WINDIR%\System32\msra.exe
%WINDIR%\System32\raserver.exe
- Port 135:TCP
- Windows XP with Service Pack 2 (SP2) and Windows XP Professional x64 Edition with Service Pack 1 (SP1)
- Port 135:TCP
%WINDIR%\PCHealth\HelpCtr\Binaries\Helpsvc.exe
%WINDIR%\PCHealth\HelpCtr\Binaries\Helpctr.exe
%WINDIR%\System32\Sessmgr.exe
- Port 135:TCP
- Windows Server 2003 with Service Pack 1 (SP1)
- Port 135:TCP
%WINDIR%\PCHealth\HelpCtr\Binaries\Helpsvc.exe
%WINDIR%\PCHealth\HelpCtr\Binaries\Helpctr.exe
Allow Remote Desktop Exception
- Port 135:TCP
- Windows Vista and later
- If you use Easy Connect, you need to enable PNRP port UDP 3540
You cannot manade Windows 7 computers from Windows XP computers. You can though oposite way (thanks to Roman Kučerák for remark).
From now I will try to convince administrators to use Remote Assistance in situations they will need it.
I hope I covered everything I wanted 🙂


Recent Comments